Showing posts with label DIY. Show all posts

Monday, November 18, 2013

Bouquet Christmas Ornaments

If you'll recall from a few posts back, Mr. C and I recently attended the wedding of some friends in South Carolina, and the bride gave me her bouquet at the end of the night. I was determined to do something nice with it, but hadn't decided between a couple of options.

Well, the groom is in town this week and won't be again before Christmas, so it was now or never. I decided to start with the ornament, and if I had extra petals I'd talk to the groom and see if the jewelry is something his bride would like.

I've been keeping my eyes open for awhile trying to find clear ornaments. Hah. You'd think with all of the shops putting Christmas things out before Halloween that it wouldn't be tough, but after visiting three local big boxes I ended up driving to the nearest Hobby Lobby. I picked up the ornaments (50% off!) and honestly that's really all I needed. Initially I was thinking of doing one big ornament, but once I got started I realized I had plenty to fill four pretty decent size ornaments. I am going to try to get some ribbon to tie to the hooks so they can hang them a little more festively, but all in all this is a relatively inexpensive craft.
One nearly completed ornament
Mr. C was off at his second to last grad school class of the semester tonight, so I took some time to put everything together. Really it was pretty simple. I'd put her bouquet into a vase to let the flowers dry after the wedding, so I carefully broke it down. There were two colors of roses, some lilies, some sort of dark berry, these little green globes, and a couple of different sizes of leaves. She also had little red crystals in the bouquet, so I put one of each of those in each ornament. It took me about half an episode of Once Upon a Time.
Strips of invitation and curled hearts
I also saved their invitation, and cut it into thin strips to make into little hearts. Each strip I folded into half, then wrapped around the skinniest part of a mechanical pencil. Initially I thought I'd hot glue the pieces of the heart together, but I think they are staying together well enough on their own.
The Moose really enjoyed helping clean up the spare paper
All in all, I am very very happy with how this turned out. We're meeting up with the groom on Wednesday, and I can't wait to give this to him. Originally I was going to wrap it in Christmas paper as a surprise, but I want to make sure he knows what it is so he packs it carefully for the trip back home.
The end result!

Wednesday, August 14, 2013

DIY: Necklace Holder

Ah, Pinterest. The source of so many projects that never leave the comfort of my excessively organized boards. Seriously guys, I have 126 boards to date, and I know that number will grow. Now, before you panic, let's look at cooking. I don't just have one "recipe" board. First, I've separated cooking and baking, because really they are two different things. Then, I've broken cooking down into categories.
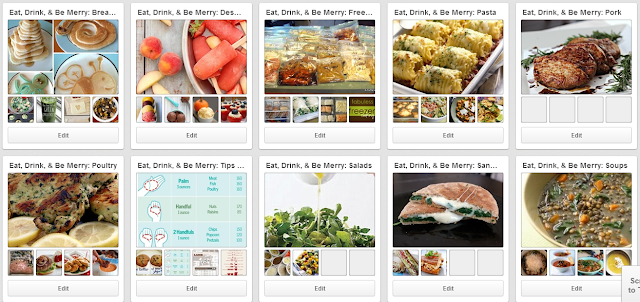
Only some of my too many Pinterest boards
Here's a quick screen capture to give you an idea. Crazy, right? To be honest, I've been on leave from work for a month, so I've had some time on my hands. If I'm more honest, it was like this before I took the time off.

Anyway, back to the point. As much as I might pin WAY to many things, Pinterest is a great source of inspiration. I'm a visual thinker, so it really helps me to be able to see projects, instead of just making "to-do" lists that mostly get ignored. What I've done instead is create "to-do" boards focused around specific projects I want to complete. During my time off we've managed to crank out a couple, and I'll get to those, but today I wanted to show you my new necklace holder.

Inspiration struck with the following photo:

Via IHeart Organizing
 If you aren't familiar with the blog IHeart Organizing, I highly recommend you check it out. I've found some really interesting tips and tricks there! Although I actually have purchased the radiator grate, I decided my first priority was not my earrings by my necklaces. You see, all of my necklaces are currently hanging on an over-the-door rack that hangs on our closet door. Which would be fine if C didn't have to wake up an hour earlier than me. He tries to be sweet and shut the door so the closet light doesn't wake me up, but 3/4 of the time the noise of the necklaces bouncing on the door does.

So, back to the Pinterest board. Were there any good inspiration shots for necklace storage that was similar to the design above that I liked so much? Turns out, there were.

Via Crafty Clariangel
Via  Victoria Cassinova
Via Life Ann Style
Not only was the last one very close to what I was looking for, but it also came with instructions! The only real adaptation I made was to modify the colors and to add some knobs along the bottom. My bathroom has sort of a transferware theme to it, and so I've been trying to find some great blue and white accessories to add in.

Turns out I'm a bad blogger and didn't take photos throughout the process, but it was pretty easy.
1. Purchased supplies: frame (goodwill), white paint and sponge brushes (Michael's), blue and white knobs (Hobby Lobby), and white hooks (Kmart)
2. Painted frame white. It ended up with sort of a vintage-y look, which wasn't intentional but I think it worked pretty well.
3. Used C's drill to make holes for the knobs and hooks
4. Attached knobs and hooks
5. Realized the drill bit I used for the hooks was too big, so dug out some gorilla glue to make sure they stuck
6. Hung the whole thing on the bathroom wall, and added my necklaces.
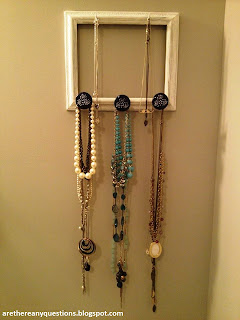
Sorry for the poor quality, but here is the end result!

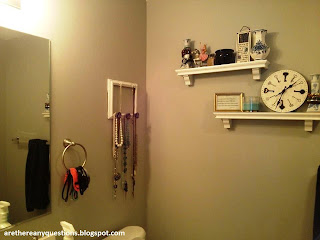
The whole corner, plus the shelves for my knickknacks. Note the goodwill candlestick bracelet/watch holders!

Voila! Not perfect, but for one of my first real "DIY" crafts, not too shabby! I have an oval frame that I'm planning to hang with ribbons across for clips and sunglasses, and I am also planning on converting my oatmeal container into a holder for my headbands, rather than using the towel rack.

Thursday, July 11, 2013

Wedding Craft One Conclusion, or Please, Please, Please

Check out Part One of this post!

Sorry to leave you hanging with that last post, but I wanted to make sure all of my girls had received their
necklaces before I gave too much away. Actually, I totally blabbed with my mad and matron of honors and asked them before they got them, but patience has never been my virtue.

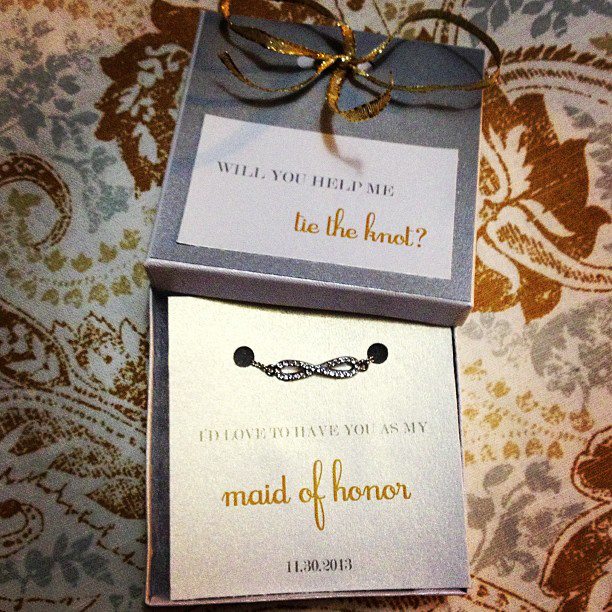
So, the big reveal!


We'll have to see how many knots actually get tied, but I thought it was cute. I won't make them actually wear the necklaces day of if they don't want or if they find something better, but my dear future sister-in-law put it on right away :) Made me pretty darn happy!

Here's a look at the supplies:


The papers I designed myself on InDesign at work over my lunch breaks. Nothing too exciting, but they get the job done. I printed them on some leftover thick paper we had sitting around the apartment, cut them apart using my fun little paper cutter, punched the holes, slipped the ends of the necklaces in, and then put them in the boxes. 

I had planned on purchasing boxes online, and had actually placed an order when my coworker asked if I had any need for some old cardboard jewelry boxes she was getting rid of in our gift shop. Heck yes I did! She gave me a stack, and saved me a few bucks. Honestly, the biggest expense was shipping them to my ladies across the country!

I'm so glad I did these. They came together really well, only took about an hour when it was all said and done! 

Friday, July 5, 2013

Wedding Craft Number One, Or Hopefully No Green Necks

So, as I've mentioned before, Pinterest is a wonderful and terrible thing. There are so many IDEAS, which also means there are so MANY ideas. It can be a little dangerous. But, pretty early on, I found one that I knew I wanted to do.

I have a number of remarkably special women in my life, but for me knowing which of those women to ask to stand with us was pretty easy. There are other great women not in the bridal party that I am really hoping to include in other ways, because gosh I'm lucky and know a lot of amazing women.

But, I wanted something special to ask my bridal party. On pinterest, there were lots of suggestions, but this was my favorite:
Via Cafe and Cream
I debated for quite some time about the type of jewelry to get for the girls. Finally, I decided on a necklace. Most of my girls don't wear extra rings or bracelets, so it was a pretty easy choice. I also wanted something in a knot or bow shape. Initially, I looked on Etsy, and did actually find a necklace I liked until I did the math and realized that, for five girls, I'd be looking at over $75. 

In the grand scheme that isn't terrible, but I wanted to see if I could find a less expensive option that I still liked. After much web browsing, I found an adorable necklace from Forever 21. I don't think the girls will mind me telling you that the final tally was $1.80 a pop, and I really don't think they look cheap at all. The true test is if they turn anybody's necks' green. 

Wednesday, April 10, 2013

DIY: Sofa Shelf

Mr. C and I moved in together this last December, and luckily for both of us, he had furniture and I didn't. The good news is that he has a really big, comfy sectional couch. The bad news is that it is MASSIVE, and actually sticks out into the apartment hallway by about an inch. It also means that there was no room for end tables to set lamps on, meaning our living room was REALLY dark.

Pinterest to the rescue! I was just browsing along one day, when I stumbled across this gem. 
Via Bobi Law Designs

Their couch is almost the exact same shape (and color!) as ours, and Mr. C really liked the look of this. We adjusted a little, as turns out he doesn't actually like the sunburst mirror, but here's where it's at now. You can't tell in evening, but during the daytime the mirror makes the room so much brighter and bigger!


If you look carefully, you can tell the board hasn't sticks out even further than the couch does. Mr. C has promised to take it over to the house of a friend who has tools soon. At that point we're also planning on staining it a dark brown to match the coffee table. I'm hoping to eventually get some cute picture frames and knickknacks to go along the ledge. The lamps and the mirror we got from Kirkland's. I'm still not convinced that the lamps are a different enough color from the wall, but they work for now.